Showing posts with label Recycle. Show all posts

Tuesday, December 6, 2011

Are you still with me?

No joke, are you still with me??

I am the first to admit I have been a horrible blogger, but to be real with you all.... I have had my life handed to me several times over the last 6 months (more on that later), and am ready to finally take my own step and do something I LOVE to do!

I love reading everyone's comments each day, it drives me to be more creative.  So, I am setting personal goals to do a post 3 maybe 4 days a week.  Some will be crafty, and I may throw in a pity party here or there.... KIDDING! (ok just a little)

Over the summer my sister came over and needed a gift idea for a friends wedding, and she needed it in like oh..... 2 DAYS!!  That;s my sister for you.  So I put my little brain to work, and did some digging.  I wanted to create something special for the couple, but it needed to fit their outdoorsman style.

So i grabbed some old fence boards, and cut them to the size we wanted, and then split another fence board to act as the support braces for the entire piece.  When my grandparents moved into their condo, my grandfather left my husband and I all of his old coffee tins full of goodies...  let me just say... HE KEPT EVERYTHING!  There was one in there labeled "hooks", so I opened it up and literally squealed!  I had never gotten into it before, and it is now my go to place!!

After I got the hooks picked out, I cut out their last name with vinyl, and the current year (when they are getting married) and stenciled it on with some leftover primer that my hubby had in his shed.

Here is what she ended up with!


I think my sister melted a tad when she saw it, and had no idea I could whip something like this up in 30 minutes!!  She called me a couple days after the wedding to tell me that when the couple opened their gift they grabbed the phone to call her and thank her sooooo  soooooo much for the amazing gift!  They say it is their favorite and one to cherish for a lifetime!

So, I would say my job was well done!  :)

Alright my friends, I am going to run.  I have my annual ladies ornament exchange to go to tonight and I still need to wrap my ornaments that I made (pictures to show you soon)

I cannot wait to share with you everything we have had going on.  Some GREAT news, and some just plain news... but coming up tomorrow is my Vintage Christmas Mantel with my Ballard Design knock-off stockings!

Thanks for coming by!

Check out these fabulous blogs I am linking up to:

The Shabby Nest

Monday, February 14, 2011

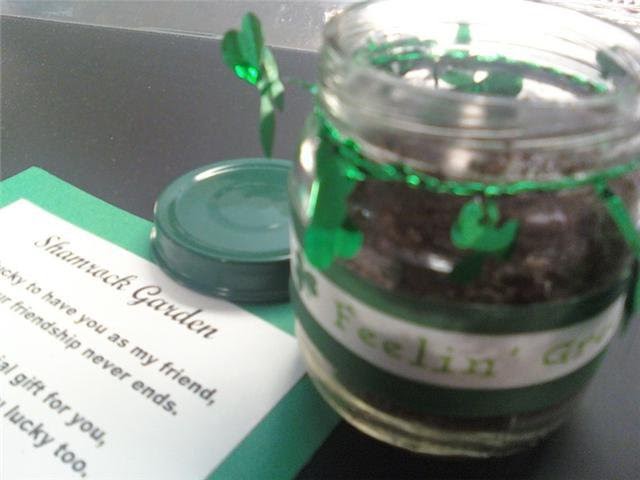
Shamrock Gardens....

UPDATE:  This is one of my first few blog posts, so forgive the amazing photography!
 
Is it really Valentines day already??  Wow, time flies when you are crafting! 

I am going to show you a craft that I came up with last year, and since I didn't have my blog, the pictures really arent that great, so I am apologizing now!  I also do not have step by step picture tutorials, but I will still tell you how to make them!!

Here we go!  This is the finished product!


Materials:
Babyfood Jars
Green Spray paint
Ribbon
Foil garland
Glass rocks (for drainage)
Soil
Hot glue gun
Potting Soil
Shamrock Seeds (you can get these on ebay, the place I ordered them from now has a min. of 12 pkgs)

Step#1 - Clean out the baby food jars and spray paint the lids green. (I used the $1 paint for this project from Wal-Mart)
 
Step #2 - Glue the ribbon around the center of the jar, and glue the garland around just under the neck of the jar.
 
Step #3 - Place the glass rocks in the bottom of each jar.  (i used clear, but you could use green and that would look great too!)
 
OPTION- At this point I moved on to create the poem cards because I had the entire class plant their own gardens.  It made a great class project, but the rest of the directions are as follows.
 
Step#4 - Fill the jars 3/4 of the way full with potting soil. Try to find some with fertilizer, like Miraclegro.... they grow faster! (or Organic)
 
Step#5 - Place 3 seeds in each jar, and top with potting soil, but do not pack them in tightly.
 
Step#6- Mist with water daily (do not over water) and keep in sunlight, and enjoy the luck all year long!
 
That is it!  You are done... and keep in mind that the lids are ONLY used for transport, so make sure the kids know that, or they will not grow.
 
Here is the poem that I wrote, yes it's cheesy, but these were first graders!!! 
 
Shamrock Garden
I am lucky to have you as my friend,
I hope our friendship never ends.
 
I have a special gift for you,
I hope it makes you lucky too.
 
Take it home and watch it grow,
and soon your luck will start to show!
 
Happy St.Patricks Day!
From Your Friend!
 
I hope you enjoyed this post!  It was so much fun coming up with this project, and I cannot wait to think of a new one this year!!
 
 
Be Sure to stop by here and see where I like to party each week!  Thank you for stopping by, come back soon!!


Friday, February 19, 2010

1st Grade Recycle project! SO FUN!

My son Gage is in the 1st grade at Adams Elementary School, and absolutely loves it! So far he has had 2 VERY amazing teachers, and loves going to school every morning, and as a mom, this is GREAT!!

Last week he was sent home with a Recycle project as his homework! I could not have been happier!

Here are the things he and I came up with! This was right up my alley, and I had so many ideas, but this was his project, so he got to decide on his own!

Starbucks Utensil caddy! Materials: 2 Dannon yogurt boxes, packing tape, black spray paint, 4 starbucks cups, toilet paper, pens & colored pencils!

Book / Magazine Holders! Materials: 3 cereal boxes, hot glue and black spray paint!

Flower Vase! Materials: 7 Yougurt smoothie containers, hot glue, yellow spray paint, 7 silk flowers!

Here is a picture of it without the flowers!


Cardboard Stencils! Materials: Misc. food/beverage boxes, cricut, binder ring!

As you can see, there are SO many different useful things to do with recycles, I would love to hear about or see some of your ideas!!

The starbucks caddy was such a hit in the classroom, that I am actually going to modify this, and make it even more useful!! So keep your eyes peeled for that project!!