This post contains affiliate links
Hello Friends! Today I am here to share a simple tutorial on how to create your own clip board stand to use with free printables.
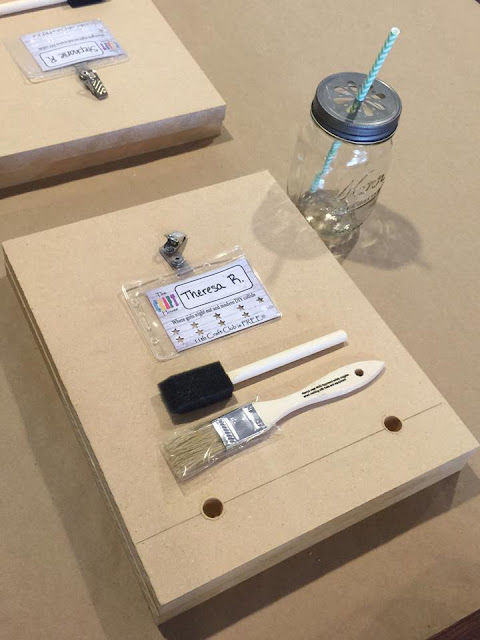
For Craft Club in August we created these fun boards and I loved getting to see all the color and pattern variations that everyone chose.
Here is what you will need:
- 3/4" MDF (or any other sheet material you wish to use)
Take your Scrapbook Paper and place it on the board, leaving a reveal area that will create a border on the finished project.
Flip it over with the paper and trace the opposite corner and then cut along your lines.
Place the paper back on the front side to make sure it is the size you want. Then set the paper aside.


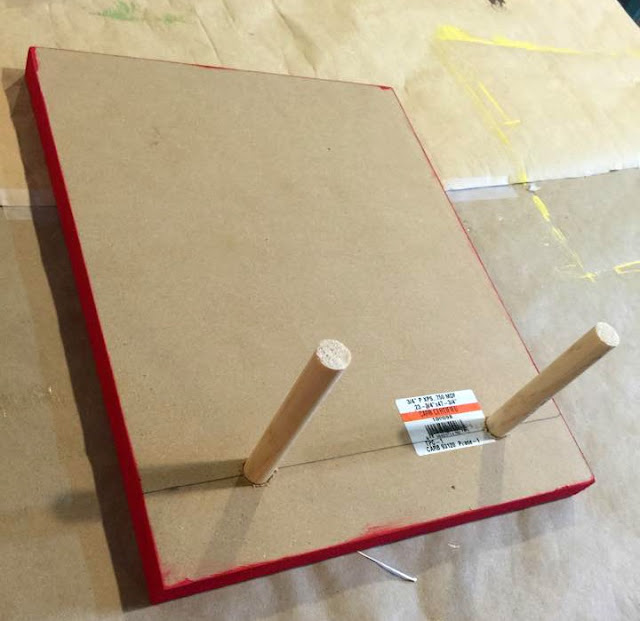
Draw a line at 1.5" from the bottom and Drill two holes 1/2" deep using a 1/2" Drill bit (be sure not to go through the board) at 1.5" in from each side on the line that you previously drew.
Cut a 1/2" dowel to 4 inches and place in the holes. You can hot glue them in if needed, I however did not glue them since I would be giving this as a gift and wanted to be able to box it up.
Flip it over and give it a nice coat of Acrylic Paint in the color of your choice. The dowels act as a great stand, however be sure to paint all 4 edges.
Once the paint has dried you will then put a nice even layer (not too thick, not too thin) of Mod Podge on the entire front of the board and place your scrapbook paper on top. Remember that the dowels are the legs and that will be the BOTTOM of your stand, so make sure your paper is facing the right way.
Take the time to rub the paper for a good 4-5 minutes ensuring a good seal and to eliminate bubbles. Be sure to run along the edges as well. Let dry for 15 minutes or longer before applying the top coat.


Once that has dried, apply an even layer of Mod Podge over the entire front and 4 side edges of the board. Let dry for 15 minutes or longer. (do not touch this, as it will leave marks)
Using my Laminator I selected a few printables and laminated the ones that I thought I might want to use for these clip boards.
My children each have their chore charts on these fun boards and we all love them so much!! You really can create any color or style to match your home. The possibilities are endless.
That is it! Such a fun and simple project. Maybe you are thinking about hosting a craft day with some friends? This is a great project to do with a group. You can head to Home Depot and have them cut your 3/4" MDF for you to make it easier.
I'd love to answer any questions you may have on how to start a craft club in your area, it truly is so much fun!
Thank you for stopping by today. Don't forget to follow me on Facebook and Pinterest, and you can find me on Instagram and Periscope @OneThriftyChick and on Twitter @JennJSheffler.

Come Join me weekly at the following Parties:
Wednesday: Gingersnap Crafts,
Thursday: A Glimpse Inside, The Pin Junkie, The Answer is Chocolate, Imparting Grace, Meadow Lake Road
Friday: Remodelaholic, The Shabby Nest, Serenity Now, The Crafted Sparrow , Tatertots & Jello, Just Us Four, The Pin Junkie, My Turn For Us
Saturday: I heart Naptime, Flamingo Toes, Sew Many Ways,


1 comments:
I was trying to see what laminator you have but the link does not work. Do you have the name of it?
Post a Comment
Living life, one thrifty adventure at a time!