
This post contains affiliate links

Earlier this year we finally got around to constructing our Built-In media center in our living room. To see how we built it click here.
Today I am sharing how we finally finished this amazing project.
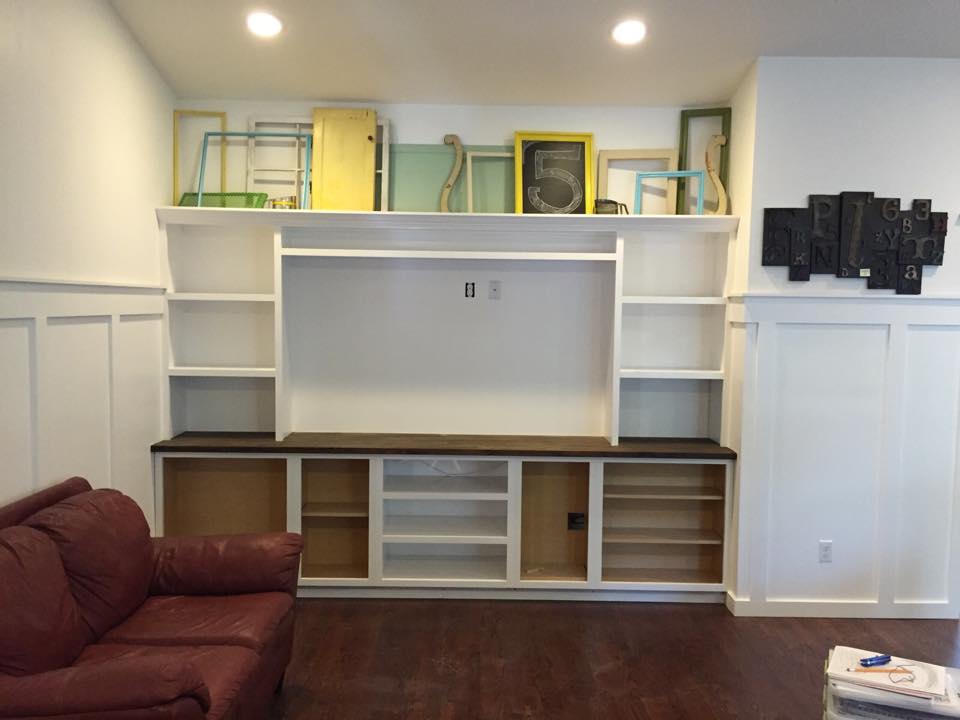
Here is where we started........

And here is where we left off......

It was all about function at the time we built it, and weren't too worried about painting.
In the coming weeks, months and days I have some very exciting news that I cannot share yet, which has prompted the completion of this project.

We started by removing everything from the unit, and taping it all off to prep for paint.

We used our small paint sprayer and sprayed this with a synthetic oil based paint that we used in our kitchen remodel that you can read about here.

This really took no time at all, the taping was probably the hardest part. Once the painting was complete we had the bright idea to add a new coat of stain to the counter before we put the poly finish on.
Bad idea.... this went horribly wrong. The stain bubbled and turned into a chalky mess..... not sure what happened, but it led to a complete re-sand of the countertop.

Sanding was a disaster, and created a total mess, but it had to happen.

Once completely sanded down, we applied two new coats of Red Mahogany minwax stain followed by 4 coats of water based polycrylic. It looks so amazing!!

We then hung the doors and installed the hardware.

While the hubby installed the hardware on the doors I played around with some barnwood as an accent wall.
I was lucky enough to score a large amount of salvaged barn wood for free that was being taken out of a project our company had been working on.
Thanks to Debi my amazing friend/customer for thinking of me!!

I love how the wood ties in with the countertop and the flooring. And it actually made the room seem larger with the break in all of the white.

Once everything was done, I started to play around with décor.
I have a love for old globes and have collected many over the years and haven't really found a home for them.
I left one globe up there until I had decided if that was the look I was going for.

In the meantime we found these awesome LED puck lights that have a remote control that were the perfect addition to our built ins.
You can find them here. They provide a professional look for a fraction of what it would cost to have an electrician hard wire lighting.

I grabbed more décor from around the house and brought out some of my globes. I loved the simplicity and classic look the gloves provided against the barn wood.
Here is the before and after!

Thank you to my readers for stopping by today. Don't forget to follow me on Facebook and Pinterest, and you can find me on Instagram and Periscope @OneThriftyChick.

Come Join me weekly at the following Parties:
Wednesday: Gingersnap Crafts,
Thursday: A Glimpse Inside, The Pin Junkie, The Answer is Chocolate, Imparting Grace, Meadow Lake Road, Designer Trapped in a Lawyer's Body
Friday: Remodelaholic, The Shabby Nest, Serenity Now, The Crafted Sparrow , Tatertots & Jello, Just Us Four, The Pin Junkie, My Turn For Us
Saturday: I heart Naptime, Flamingo Toes, Sew Many Ways,

2 comments:
That looks totally awesome! I love the barnwood. I have started to collect older globes too....but mine are the ones with blue oceans. Totally fun, but I don't quite know what to do with mine either! LOL
Your entertainment built in looks great! We are planning on making one over Christmas so I appreciate the inspiration. I love the globes up top. Have a wonderful week and take care, Tara
Post a Comment
Living life, one thrifty adventure at a time!